Setup
Follow these steps to set up your environment and begin the workshop.
Prerequisites
Getting Your Accounts Ready
We'll be using Microsoft tools and services, so there are a couple of quick setup steps.
-
Microsoft Account Needed:
You'll need a Microsoft account for the workshop activities. Don't worry about creating a new email! You can absolutely use your existing Gmail, company email, or even your GitHub profile. Just head to Microsoft Account and sign in or create an account using your preferred method.
-
Secure Access with Microsoft Authenticator:
To keep things secure (especially when using services like Azure), we'll be using Multi-Factor Authentication (MFA). This is standard practice (BCP) for protecting accounts.
The easiest way to handle this is with the Microsoft Authenticator app on your phone.
Please install it and link it to your Microsoft account before the workshop starts. It makes verifying your sign-ins quick and secure.
You can find it here:- Android users: Microsoft Authenticator on Google Play Store
- iPhone users: Microsoft Authenticator on Apple App Store
-
You need a GitHub account. If you do not have one, create it at GitHub.
Access to an Azure Subscription
To run the lab you need to deploy some resources deployed in an Azure Subscription. For this there are multiple options.
- Use your own Azure Subscription
- Create a free account before you begin.
- Use an Azure Pass you received from your trainer.
Note
Azure Subscription activation
- Ask you Global AI Bootcamp trainer for your event code. This is a 6 digits code.
- Navigate to aka.ms/JoinEduLab
- Follow the instructions on screen.
GitHub Codespaces
The way to run this workshop is using GitHub Codespaces. This provides a pre-configured environment with all the tools and resources needed to complete the workshop.
Select Open in GitHub Codespaces to open the project in GitHub Codespaces.
![]()
It will take several minutes to build the Codespace so carry on reading the instructions while it builds.
Lab Structure
Each lab in this workshop includes:
- An Introduction: Explains the relevant concepts.
- An Exercise: Guides you through the process of implementing the feature.
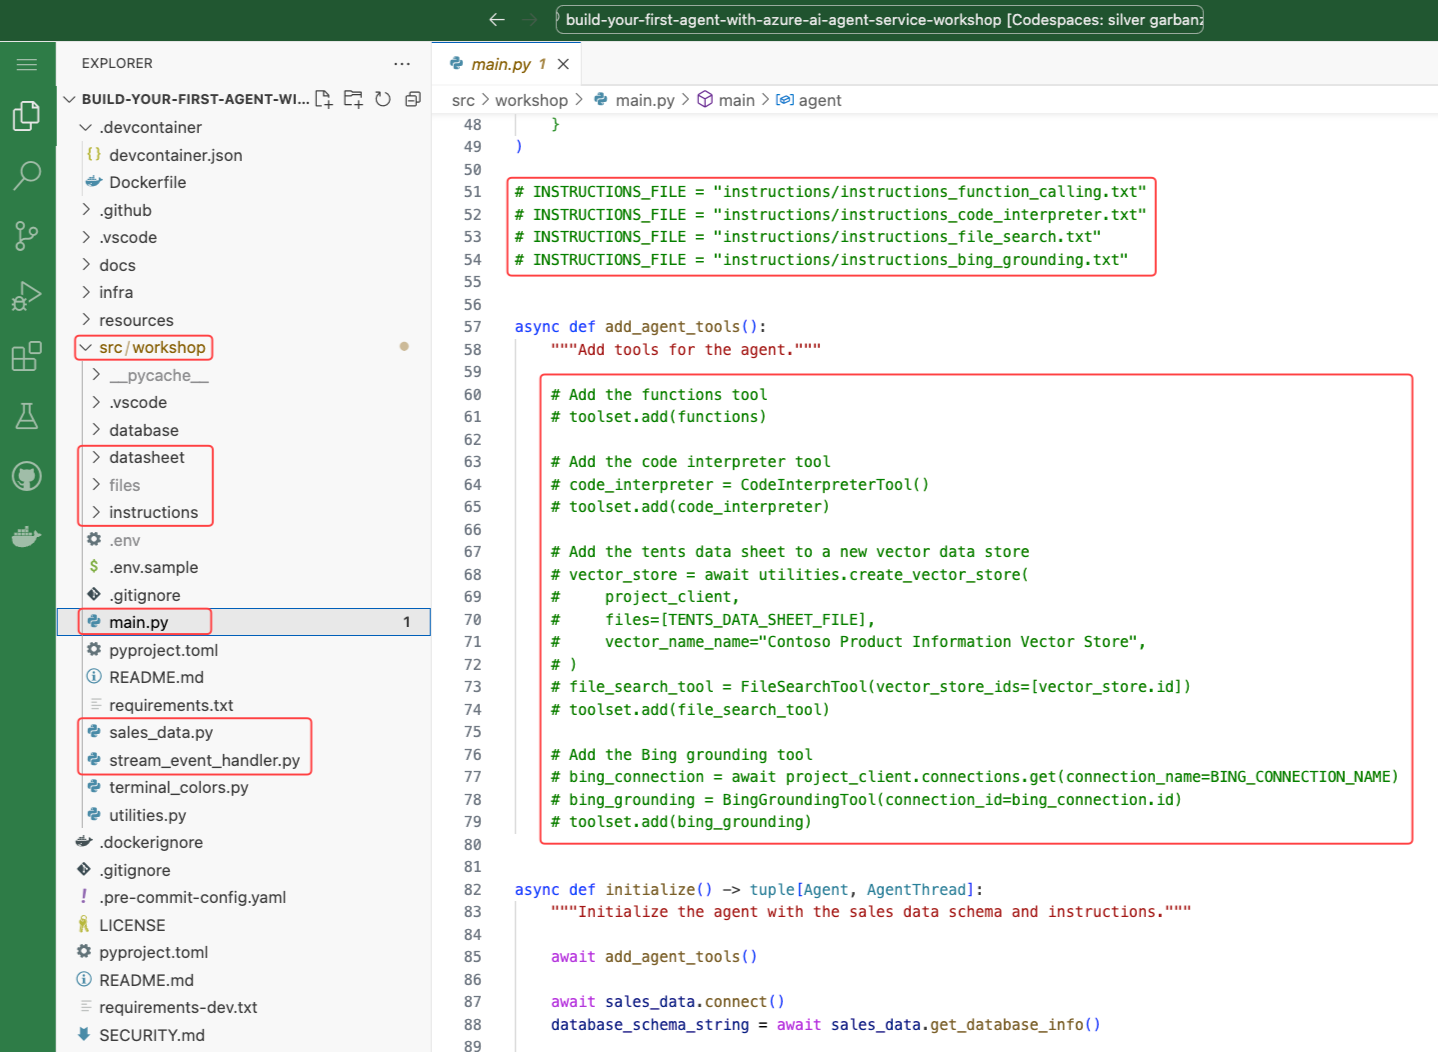
Project Structure
The workshop’s source code is located in the src/workshop folder. Be sure to familiarize yourself with the key subfolders and files you’ll be working with throughout the session.
- The files folder: Contains the files created by the agent app.
- The instructions folder: Contains the instructions passed to the LLM.
- The main.py: The entry point for the app, containing its main logic.
- The sales_data.py: Contains the function logic to execute dynamic SQL queries against the SQLite database.
- The stream_event_handler.py: Contains the event handler logic for token streaming.
Authenticate with Azure
You need to authenticate with Azure so the agent app can access the Azure AI Agents Service and models. Follow these steps:
- Ensure the Codespace has been created.
- In the Codespace, open a new terminal window by selecting Terminal > New Terminal from the VS Code menu.
-
Run the following command to authenticate with Azure:
az login --use-device-codeNote
You'll be prompted to open a browser link and log in to your Azure account.
- A browser window will open automatically, select your account type and click Next.
- Sign in with your Azure subscription Username and Password.
- Select OK, then Done.
-
Then select the appropriate subscription from the command line.
- Leave the terminal window open for the next steps.
Deploy the Azure Resources
The following resources will be created in your Azure subscription:
- An Azure AI Foundry hub named agent-wksp
- An Azure AI Foundry project named Agent Service Workshop
- A Serverless (pay-as-you-go) GPT-4o model deployment named gpt-4o (Global 2024-08-06). See pricing details here.
From the VS Code terminal run the following command:
cd infra && ./deploy.sh
Workshop Configuration
The deploy script generates the src/workshop/.env file, which contains the project connection string, model deployment name, and Bing connection name.
Your .env file should look similar to this but with your project connection string.
MODEL_DEPLOYMENT_NAME="gpt-4o"
PROJECT_CONNECTION_STRING="<your_project_connection_string>"
Note
Sharing the .env file
If you are sharing the Azure pass resources and you just deployed the Azure resources in the previous steps? This is the time to share the contents of the .env file with your fellow workshop participants. 🙏
When the contents of the .env file is shared with you, it is as easy as manually creating a .env file in the src/workshop folder. There is already a .env.sample file there to hint towards the correct location. Create the new file and paste in the contents (MODEL_DEPLOYMENT_NAME & PROJECT_CONNECTION_STRING) that was shared with you and save the file. Make sure the entire filename is .env.